Solutions
Compare
ONBOARDING · 15 STEPS
Getting started
with DigiDocs.
A step-by-step guide to setting up your company, adding equipment, and submitting your first defensible inspection.
TABLE · OF CONTENTS
In this guide
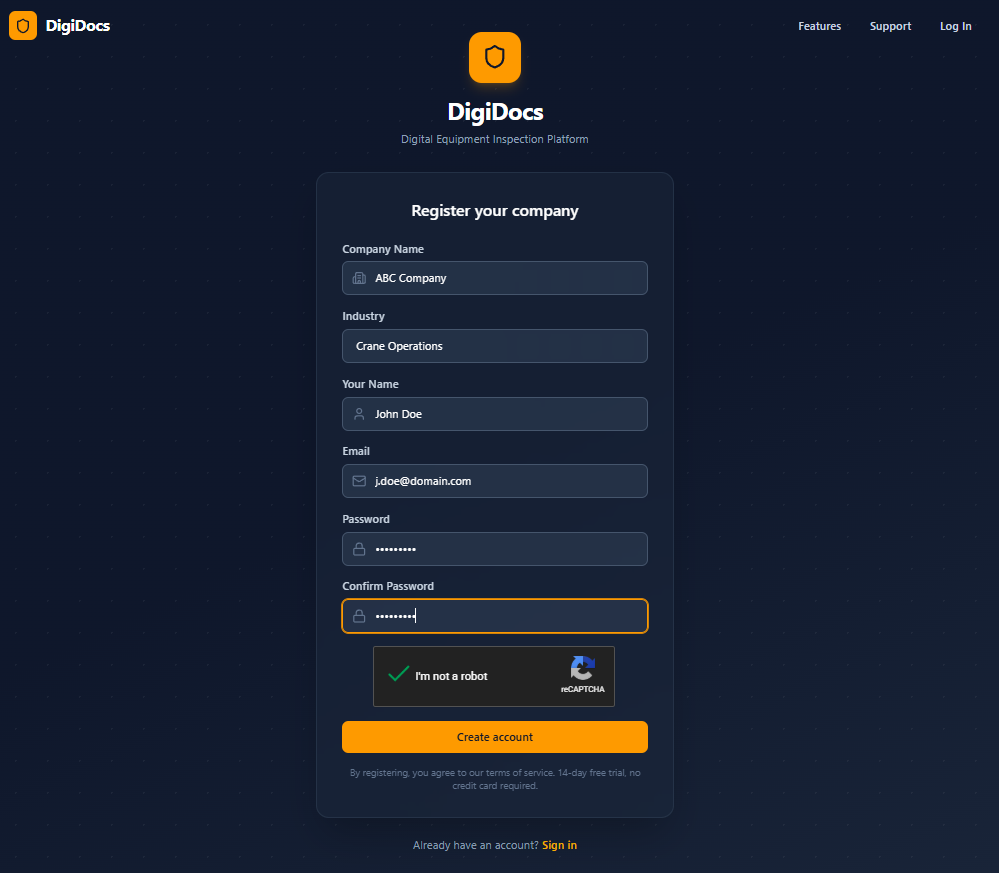
Register Your Company
Visit digidocs.app and click 'Start Free Trial' or 'Sign Up'. Fill in your company name, select your industry (this automatically configures the right modules), enter your name, email, and password.
FIELD · NOTES
- Choose your industry carefully — it pre-configures which equipment types and forms are visible
- You'll start with a 14-day free trial with full access to all features
- The email you register with becomes your admin account
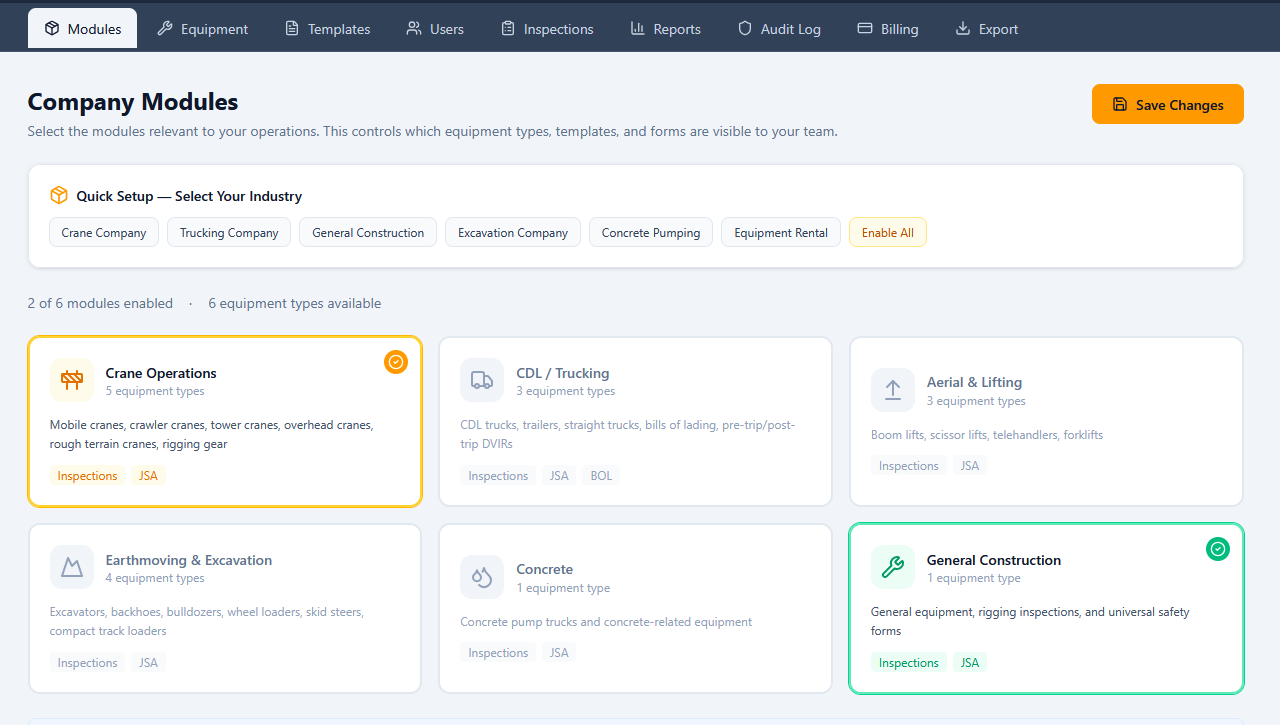
Configure Your Modules
After logging in, go to Manage Company (in the sidebar) → Modules. This controls which equipment types, inspection templates, and forms your team sees. If you selected an industry during registration, the right modules are already enabled.
FIELD · NOTES
- Use the 'Quick Setup' industry presets for one-click configuration
- You can enable or disable modules anytime — existing data is never deleted
- An excavation company won't see crane templates, and a trucking company won't see boom lift forms
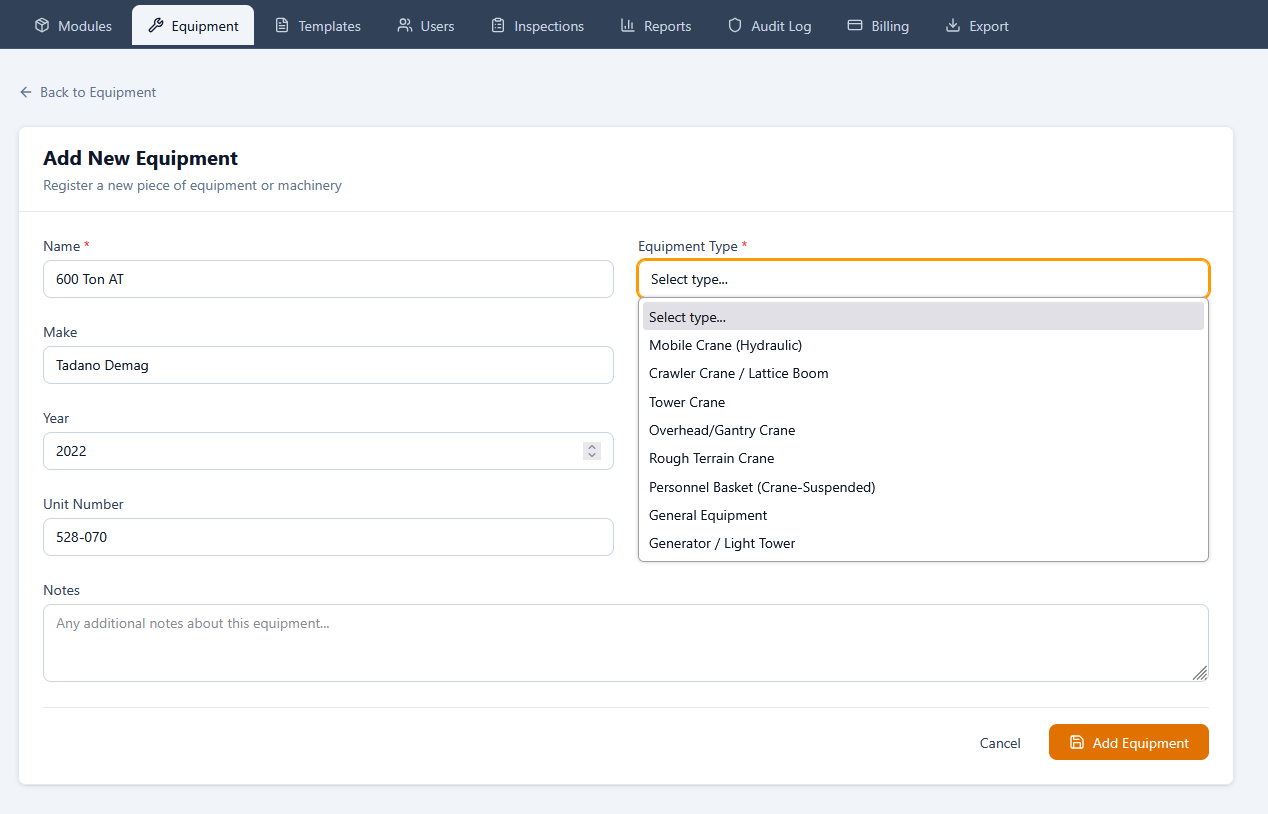
Add Your Equipment
Go to Manage Company → Equipment → Add Equipment. Enter the equipment name, type (the dropdown only shows types relevant to your enabled modules), make, model, serial number, and unit number. If you're on an Enterprise plan with branches configured, you can also assign the equipment to a specific branch.
Optional: Lock a Template
After adding equipment, edit it and scroll to "Inspection Settings". You can lock a specific template so operators can only use that template for this equipment. You can also uncheck "Track meter/hour reading" for equipment without hour meters (like rigging gear).
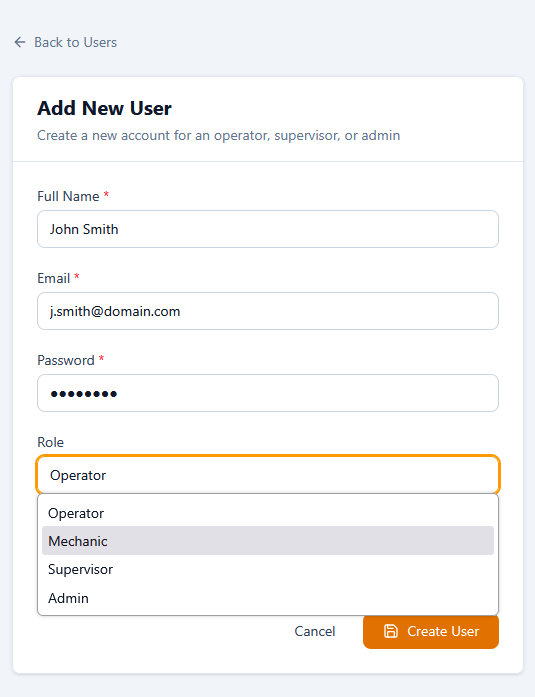
Create User Accounts
Go to Manage Company → Users → Add User. Pick how they get access: send an email invitation (user sets their own password via a secure link, 72-hour expiry) or set their password manually. Each role has different access levels. On Enterprise plans, you can also assign users to one or more specific branches.
| Role | Can do |
|---|---|
| OPS Operator | Complete inspections, create JSAs/BOLs, view equipment history |
| MX Mechanic | View deficiencies, log repairs with notes/parts/labor, mark repairs complete |
| SUP Supervisor | Everything operators can do + view all team inspections and deficiencies |
| ADM Admin | Full control: manage equipment, templates, users, billing, reports, export |
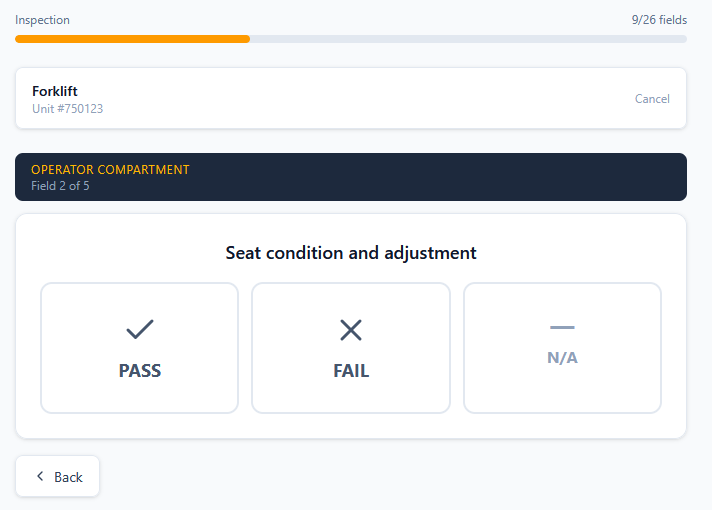
Complete Your First Inspection
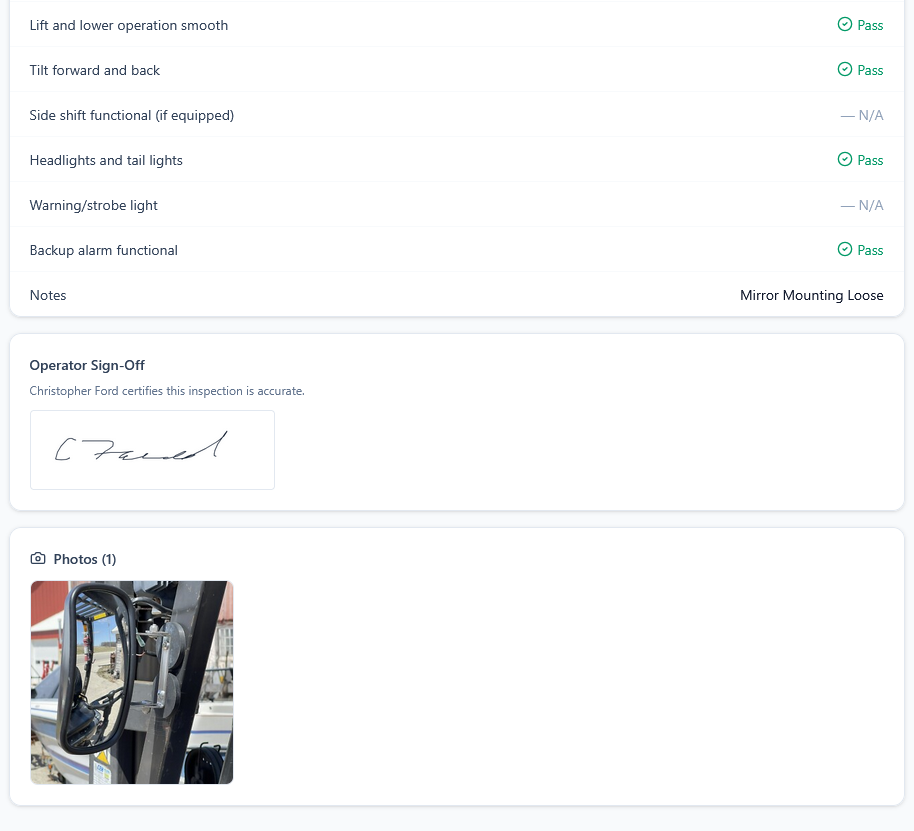
Go to Equipment in the sidebar, select a piece of equipment, and click 'Start Inspection'. The wizard walks you through each item: select a template, enter the meter reading, then Pass/Fail/N/A each item. Add photos and notes for failed items. The review step shows thumbnails of every attached photo under the corresponding field so you can verify before submitting. Make an operability determination if anything is flagged, sign, and submit.
FIELD · NOTES
- If you accidentally hit Fail, just tap Pass or N/A — the buttons stay visible
- Photos can be taken directly from your phone camera
- The review step shows thumbnails under each field so you can verify photos got attached correctly
- Your digital signature is required to submit the inspection
- If prior deficiencies exist, you'll see repair notes inline on affected fields
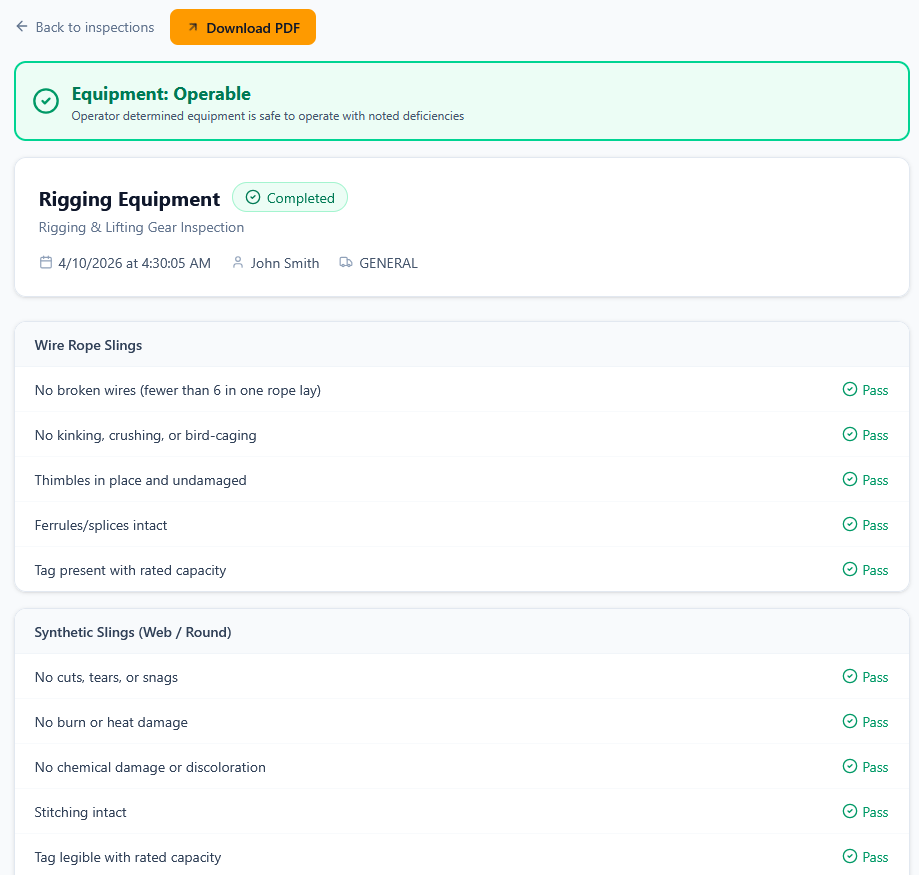
Review Inspection Results
After submitting, you're taken to the inspection detail page showing all responses, photos, operability status, and your signature. Admins can review all inspections in Manage Company → Inspections. Download individual PDFs or export data in bulk.
FIELD · NOTES
- The green 'Operable' or red 'Non-Operable' badge appears at the top of every report
- Click 'Download PDF' to get a formatted report for insurance or auditors
- Flagged inspections auto-create deficiency records for the mechanic
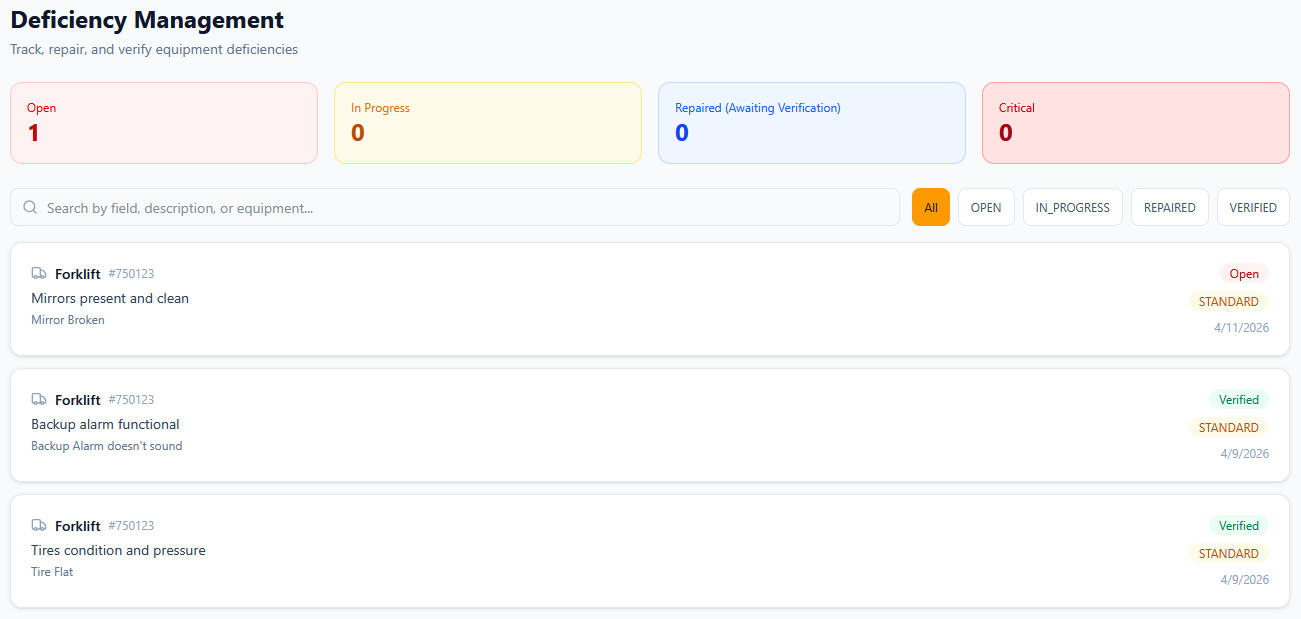
Manage Deficiencies & Repairs
When an operator marks an item as Fail, a deficiency record is automatically created. The deficiency page shows a 'Reported Evidence' card with the operator's notes and photos from the original inspection. Mechanics click 'Start Repair' to move it to in-progress, then log repair notes, parts used, and labor hours before marking it repaired. The next operator sees the repair status inline during their inspection.
DEFICIENCY · LIFECYCLE
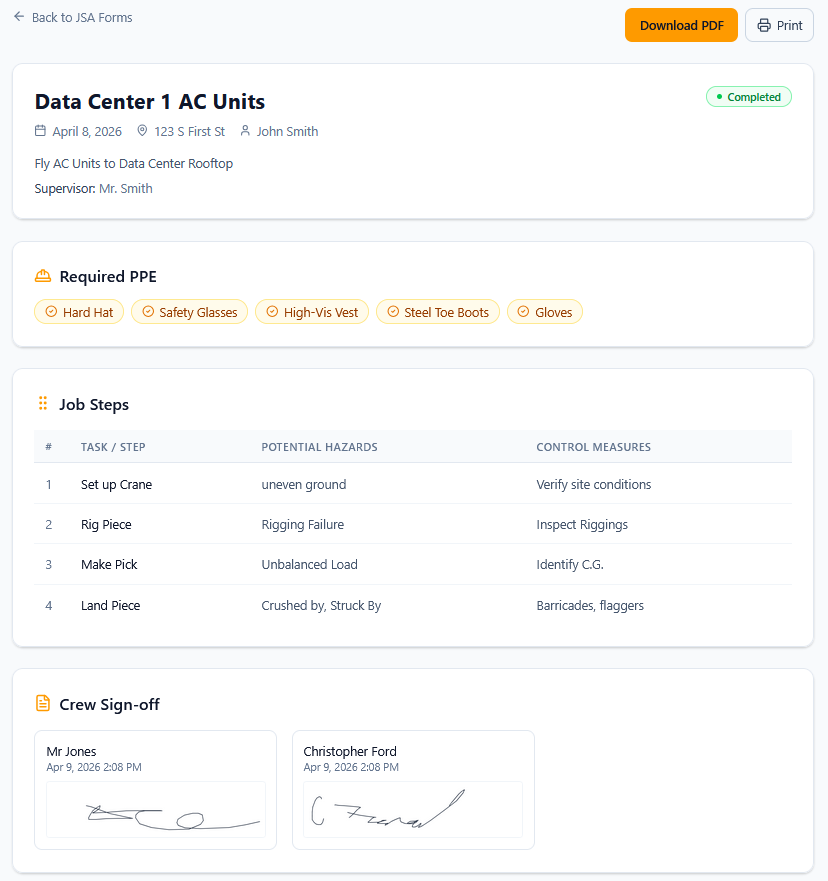
Create a JSA Form
Click JSA Forms in the sidebar → New JSA. Enter the job title, date, location, supervisor, and description. Check required PPE items, add job steps with hazards and control measures, then have crew members sign off.
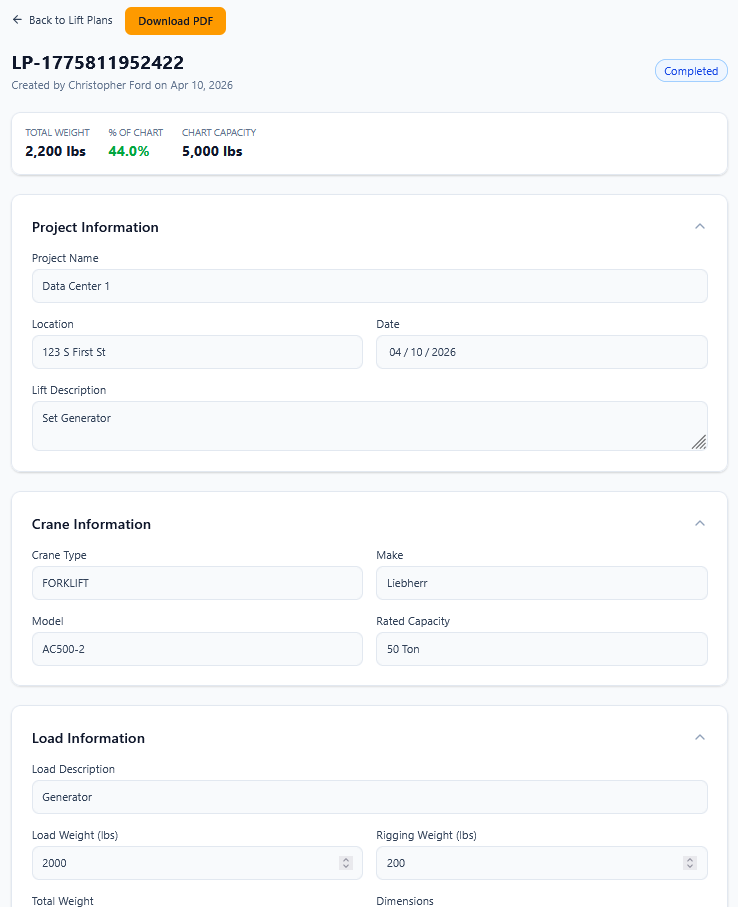
Create a Lift Plan
Click Lift Plans in the sidebar → New Lift Plan. Enter project details, crane information, load data, boom configuration, and rigging plan. The system auto-calculates % of chart capacity and flags critical lifts over 75%. Submit for approval and add signatures.
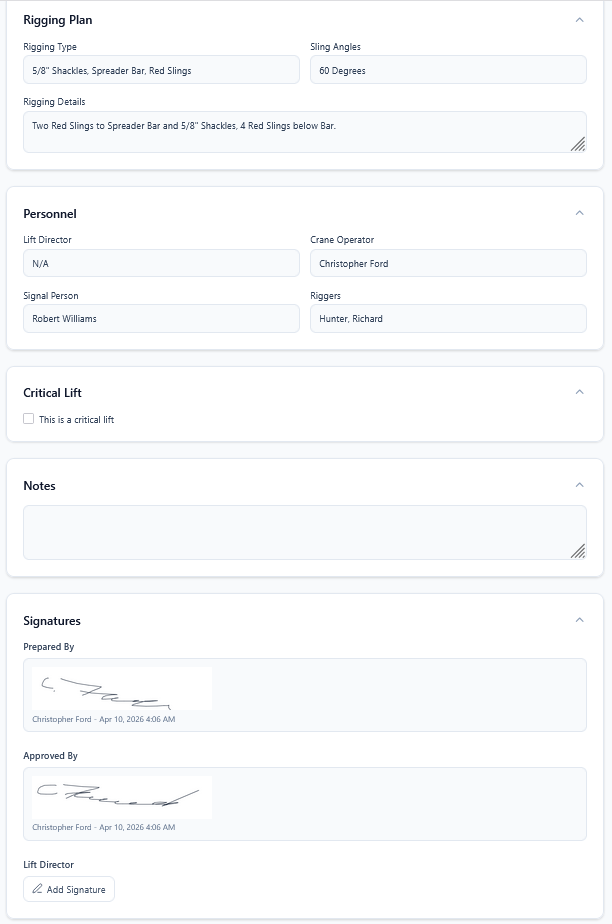
FIELD · NOTES
- Lift plans and basket plans are only visible when the Crane Operations module is enabled
- Personnel basket plans automatically apply the OSHA 50% capacity derating
Export Your Data
Go to Manage Company → Export. Select a date range, choose ZIP (PDF + CSV) or JSON format, and download. The ZIP file contains PDF reports for each inspection and JSA, CSV summaries for spreadsheets, organized by equipment and project.

Set Up Branches (Enterprise)
If you operate from multiple yards or locations, branches let you separate equipment, users, inspections, and reports by physical site. Go to Manage Company → Branches → Add Branch. Enter a name (e.g., 'Houston Yard'), an optional short code, address, and phone. Once branches exist, every equipment and user create/edit form gains a branch assignment field, and a branch switcher appears in the admin header and main sidebar.


FIELD · NOTES
- Branches are available on Enterprise (up to 5) and Enterprise Plus (unlimited)
- Admins and Supervisors always see all branches and can switch views
- Operators and Mechanics only see data from branches they're assigned to
- Equipment with no branch assigned only appears in the 'All Branches' view
- Selecting a branch filters dashboards, inspections, deficiencies, reports, and exports
Organize Work by Project (Enterprise)
Projects let you tag equipment and inspections by job site so the right people see the right gear. Go to Manage Company → Organization → Projects → New Project. Enter the project name, optional code, client, address, and dates. Once a project exists, equipment and inspection forms gain a project picker, and a searchable Project filter appears on the Equipment and Inspections lists. Assign operators to one or more projects from the Users page; rigging and other shared equipment stay globally visible by leaving their project blank.
Dallas Tower Project
CLIENT · Hensel Phelps
Houston Refinery Turnaround
CLIENT · Cherne Contracting
Lady Bird Bridge Retrofit
CLIENT · TxDOT
Unassigned (rigging & shared)
CLIENT · Globally visible
FIELD · NOTES
- Projects are available on Enterprise and Enterprise Plus
- Equipment with no project assigned is treated as global — perfect for rigging gear and shared yard equipment
- Mechanics see every piece of equipment regardless of project — they go where the repairs are
- Operators on multi-project jobs get a 'Projects' assignment with multiple selections
- The project tagged on an inspection is locked at submission, so historical reports stay accurate even if assignments change later
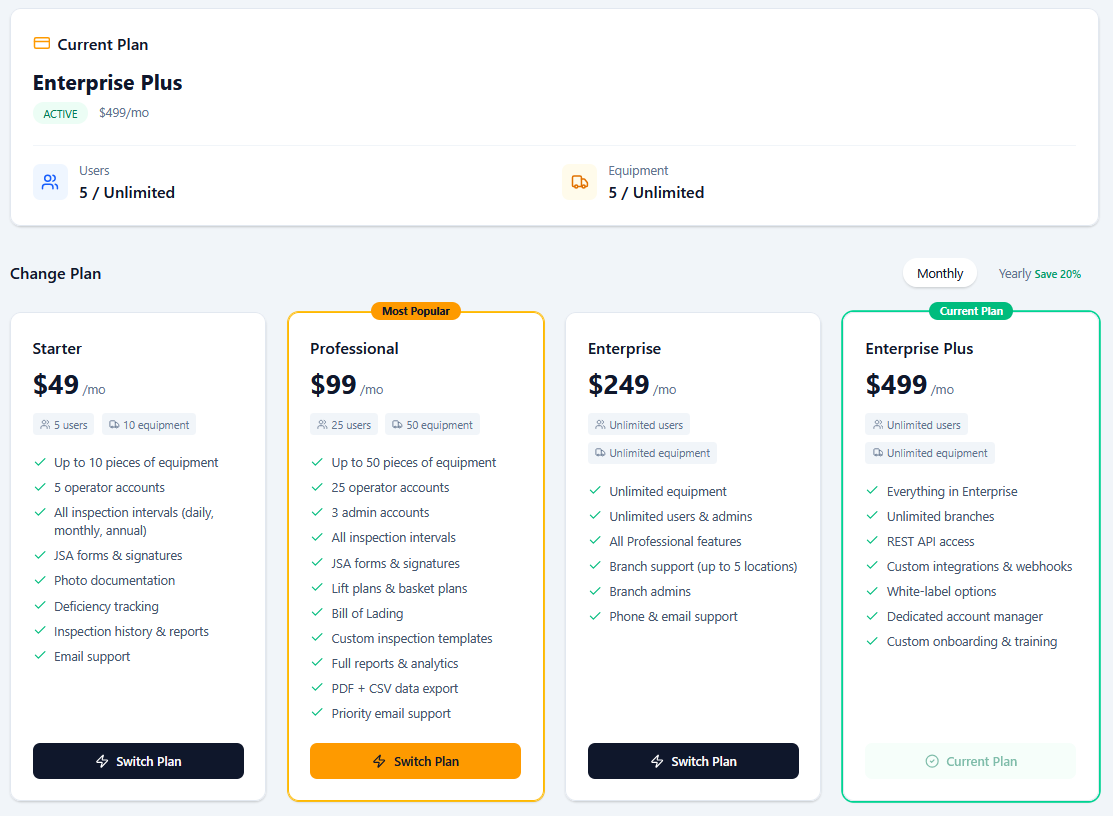
Manage Your Subscription
Go to Manage Company → Billing. View your current plan, usage (users and equipment vs. plan limits), and subscription status. Click 'Switch Plan' on any card to upgrade or downgrade, or 'Manage Billing' to update payment methods, view invoices, or cancel. Upgrade to Enterprise or Enterprise Plus to unlock multi-branch support.
Install the App
DigiDocs can be installed to your phone, tablet, or desktop as a full-screen app. On Android (Chrome, Edge, Samsung Internet): tap the 'Install DigiDocs' banner at the bottom of the screen. On iOS Safari: tap the Share button then 'Add to Home Screen'. On desktop Chrome/Edge: click the install icon in the address bar. You'll get a branded icon on your home screen, and the app opens in its own window without browser controls. Inspections work offline, too: complete one with no signal and it saves on the device, then syncs automatically when you reconnect — watch for the 'Pending Sync' indicator.
DIGIDOCS · APP
Fleet dashboard
Install DigiDocs
Add to your home screen for instant access
PWA · INSTALLABLE
No app store, no MDM.
The install banner appears at the bottom of the screen on Android Chrome and the in-app prompt on iOS Safari. Tap once and DigiDocs lives on the home screen with its own icon — no App Store review cycle.
iOS
Safari → Share
Android
Chrome banner
Desktop
URL bar icon
FIELD · NOTES
- Installed users get the full app-like experience with their own launcher icon
- Works on any modern browser — no App Store download required
- On iOS you must use Safari to install (Chrome and Firefox on iOS can't install PWAs)
- Works offline: finish an inspection in a dead zone and it saves on the device, then syncs automatically when you're back online — check Pending Sync to see anything still queued
New in V8: Scheduler, Analytics, Tool Talks & More
V8 ships eight major capabilities on top of the V7 foundation. None of them require a setting change — just look for the new menu items the next time you sign in. Below is a quick orientation; full how-tos appear in each section's help text.
FLEET
- Equipment
- SchedulesV8
- Projects
INSIGHTS
NEW · V8- Fleet HealthV8
- AnomaliesV8
ORGANIZATION
- Users
- Tool TalksV8
- Branches
SETTINGS
- Billing
- IntegrationsV8
- API & WebhooksV8
V8 · HIGHLIGHTS
Eight new capabilities, one release.
Fleet Health Scoring
0—100
Recurring Scheduler
CAL + METER
Anomaly Detection
HEURISTIC
Tool Talks Library
SIGNOFFS
Customer Share URLs
TOKENIZED
Voice & Video Notes
RICH MEDIA
Telematics Adapter
SAMSARA
REST API + Webhooks
/api/v1
FIELD · NOTES
- Admin → Insights → Fleet Health — every piece of equipment scored 0–100, sorted worst-first, with the deduction reasons broken out per asset.
- Admin → Fleet → Schedules — set up recurring inspections (calendar-driven or every N engine hours). The dashboard widget surfaces due and overdue items.
- Admin → Insights → Anomalies — automatically flags suspicious inspections (fast submits, all-pass on failure-prone equipment, meter regressions). Supervisors review and dismiss.
- Admin → Organization → Tool Talks — short toolbox talks for your team. Operators sign off; admins see who's outstanding with a built-in reminder email.
- Inspection viewer → Share with customer — generate a public read-only URL for any completed inspection. Set an expiration; revoke any time.
- Inspection viewer → Voice & Video Notes — record audio or attach video clips per inspection. Perfect for unusual sounds or hard-to-photograph issues.
- Admin → Settings → Integrations — connect telematics (Samsara stub today; live providers landing soon). Pulls engine hours, mileage, fault codes.
- Admin → Settings → API & Webhooks — generate bearer tokens for /api/v1 and subscribe to inspection.completed events.
- Admin → Templates → (any template) — drag-and-drop section and field reordering, plus 'Show only if…' conditional field visibility.
- Admin → Users → Edit — set an operator's Equipment Type Scope (e.g. CDL Trucks + Trailers only) for driver-style restrictions.
QUESTIONS · LEFT OVER
Need more help?
Check our FAQ or reach out to the team that built it.